
You can synchronize contacts and companies (prospects and customers) of your Sellsy CRM with Webmecanik Automation.
Before setting up this synchronization, a reflection phase about the fields you want to synchronize with Webmecanik Automation is necessary. Indeed, to support Sellsy's custom fields, their equivalents must be created in Webmecanik Automation while respecting the field format as indicated in the following table:
|
Sellsy |
Webmecanik Automation |
|
simpletext |
text |
|
richtext |
textarea |
|
numeric |
number |
|
amount |
Unsupported |
|
unit |
Unsupported |
|
radio |
select |
|
select |
select |
|
checkbox |
multiselect |
|
date |
date |
|
time |
text |
|
|
|
|
url |
url |
|
boolean |
boolean |
|
third |
multiselect |
|
item |
multiselect |
|
people |
multiselect |
|
staff |
multiselect |
Once the fields are created on both sides with their respective type, you can start configuring the synchronization.
Here are the steps to follow:
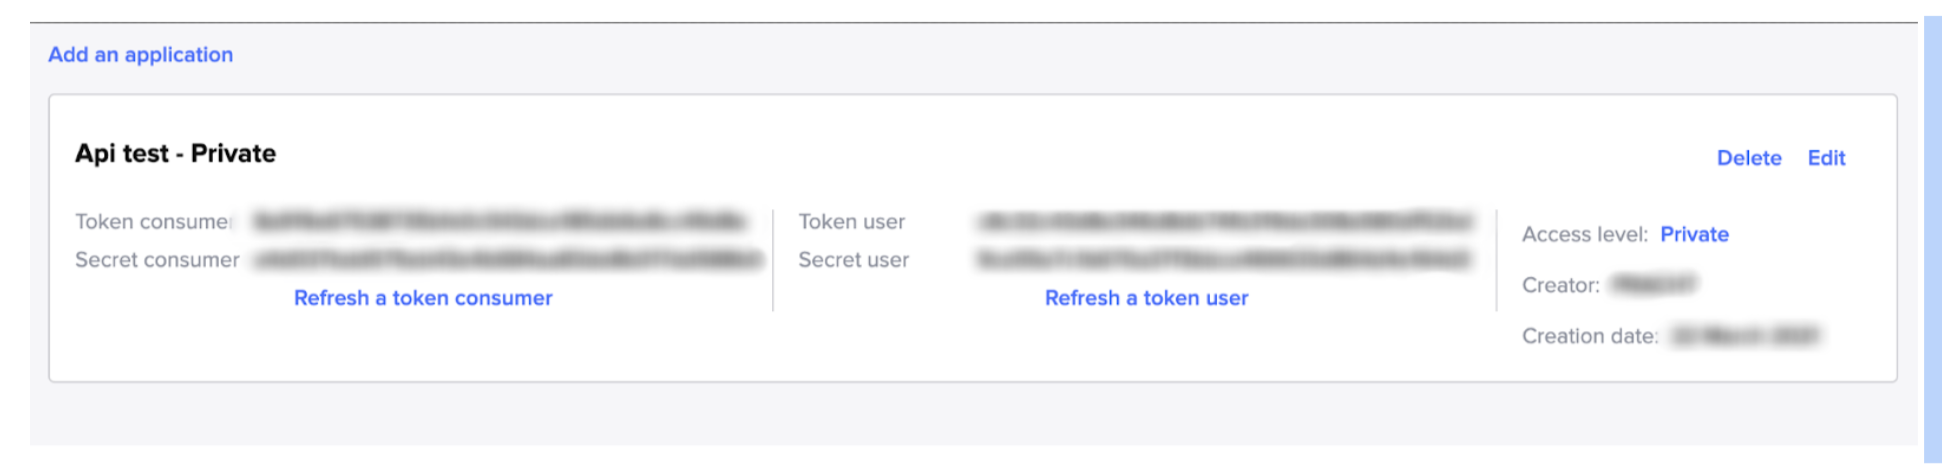
1 - Creation of an application to connect with Sellsy:
Create the Sellsy API credentials that allow you to communicate with your Webmecanik Automation instance. You can retrieve them from this page: https://www.sellsy.fr/developer/my-apps.
Follow Sellsy’ tutorial to create an API key.
2 - Configuration of the Sellsy plugin in Webmecanik Automation:
Login your Webmecanik Automation account. From the configuration menu, go to the Plugins page and click on the Sellsy plugin.
Fill in the Sellsy API crendentials in their respective fields. The API Url parameter must have the value: https://apifeed.sellsy.com/0/
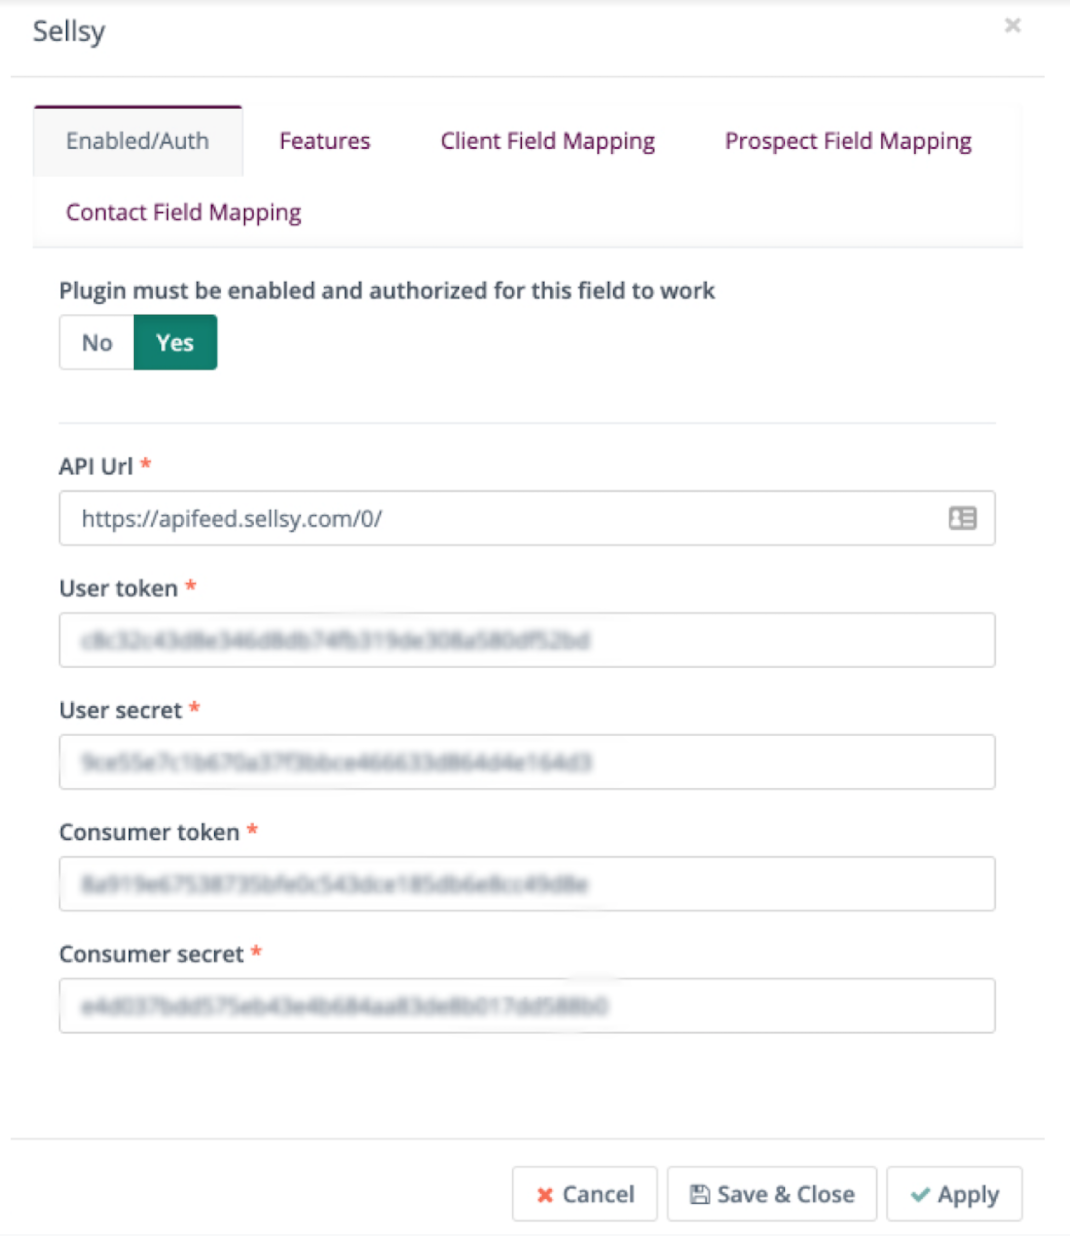
Activate the plugin and validate this configuration by clicking on the Apply button.
If the plugin is correctly authenticated, new tabs will appear to setup the rest of the configuration.
3 - Configuration of synchronization behavior:
Once the plugin is authenticated, go to the Features tab to define the behavior of the synchronization.
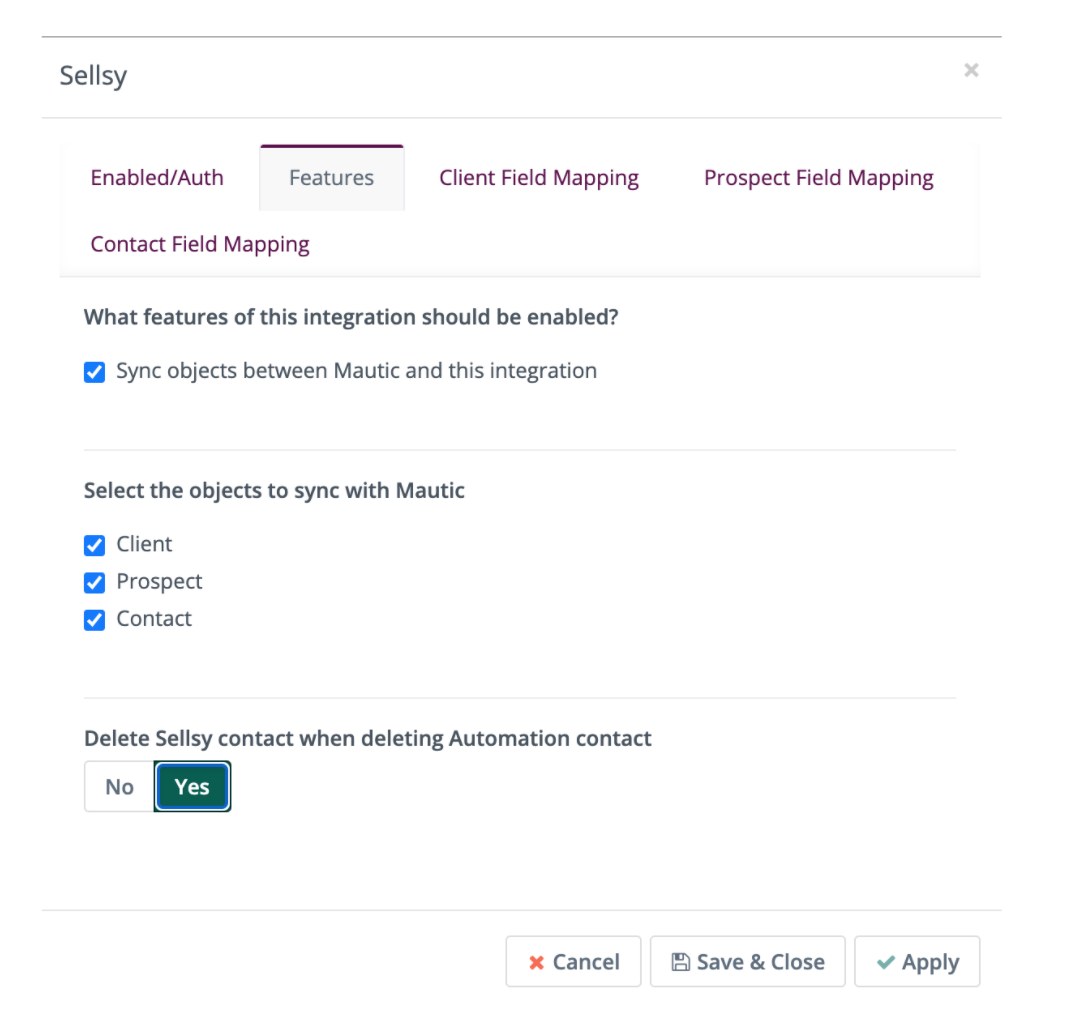
- The option "Sync objects between Mautic and this integration" will allow you to activate automatic synchronization between the two softwares (bidirectional). It is also possible to synchronize the data to only one direction. Feel free to contact Webmecanik support at the end of the configuration so that they can set up the automatic system carrying out this synchronization on your account.
- In the Select the objects to sync with Mautic section, you can choose the entities you want to synchronize between Sellsy and Webmecanik Automation.
- The "Delete Sellsy contact when deleting Automation contact" option is disabled by default. If enabled, contacts deleted in Webmecanik Automation will also be deleted in Sellsy
- Also note, it is possible to synchronize contacts immediately using the send contact to Sellsy action. This action is available in campaigns, forms, and point triggers. It is particularly useful if you do not want to send all Webmecanik Automation’s contacts to Sellsy, but only following the submissions of specific forms, or specific behavior in a campaign.
4 - Field mapping
Match your custom fields created previously in Webmecanik Automation with Sellsy’s fields. It is necessary to map at least the required fields identifiable with an asterisk in order make working the synchronization.
- The amount and unit fields can be synchronized from the integration to Webmecanik Automation but not the other way around.
- You must be careful when handling Sellsy fields of type third, item, people and staff field. In Webmecanik Automation the types compatible with these fields are the single and multiple choice drop-down lists.
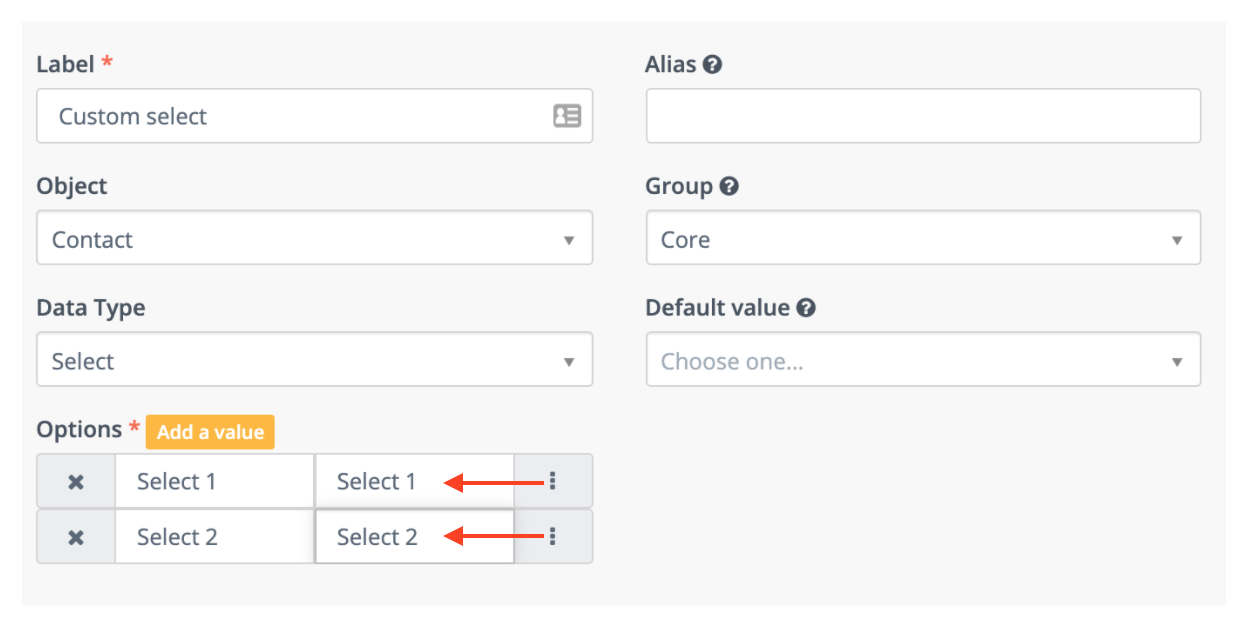
The names and values of Select and Select - Multiple type fields must be mapped correctly for their synchronization to work properly.
For Select type fields:
Here is the Sellsy side field:
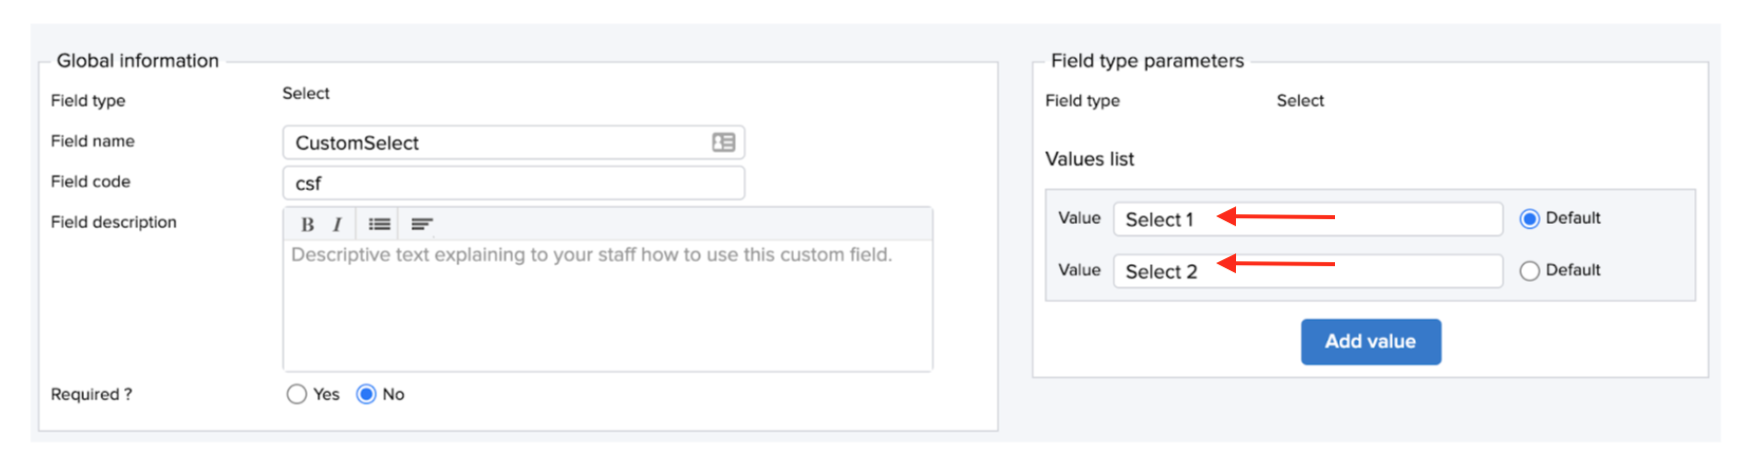
In Webmecanik Automation, the value in the right part of the selection field must match the value in Sellsy.
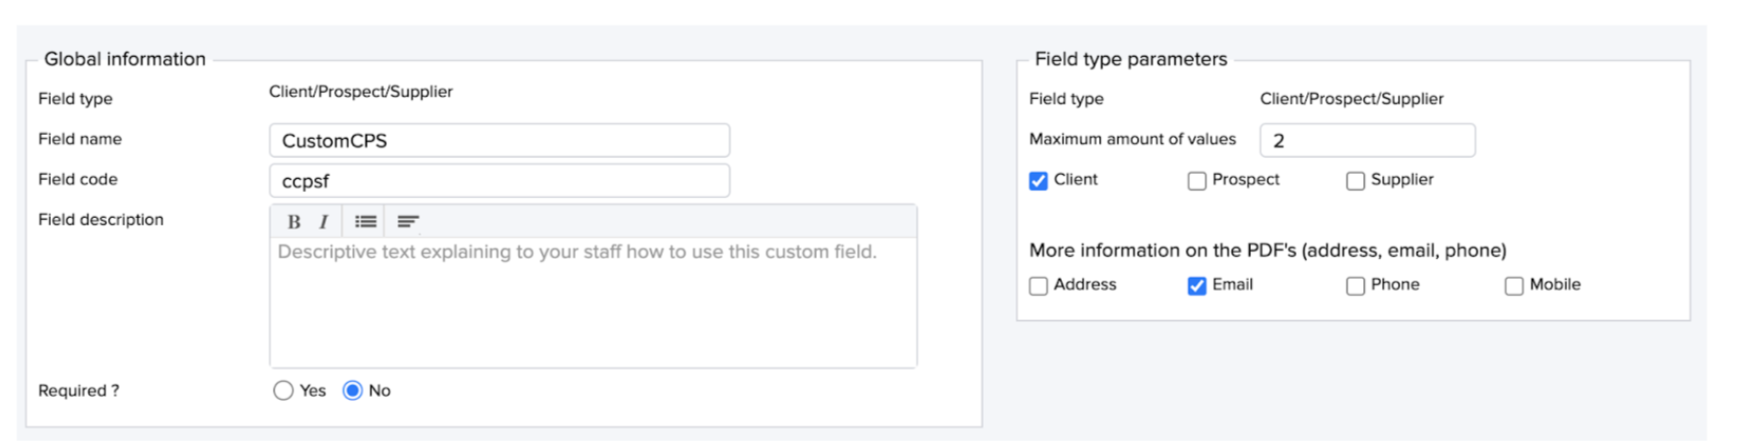
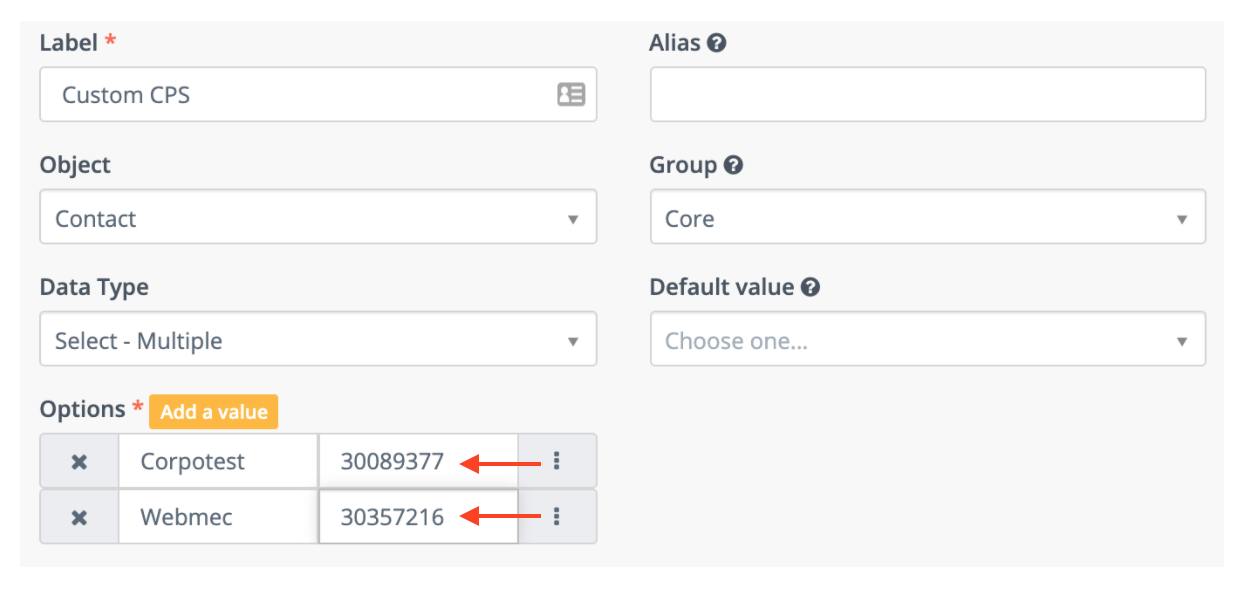
For Select - Multiple type fields (entities):
Here is an entity type field on the Sellsy side:
In Webmecanik Automation, the identifiers of the linked entities must be known and defined in the value of the corresponding option.
After you have correctly configured the behavior of your synchronization, do not forget to click on the Save and Close button to save the configuration.
Comments
0 comments
Please sign in to leave a comment.