
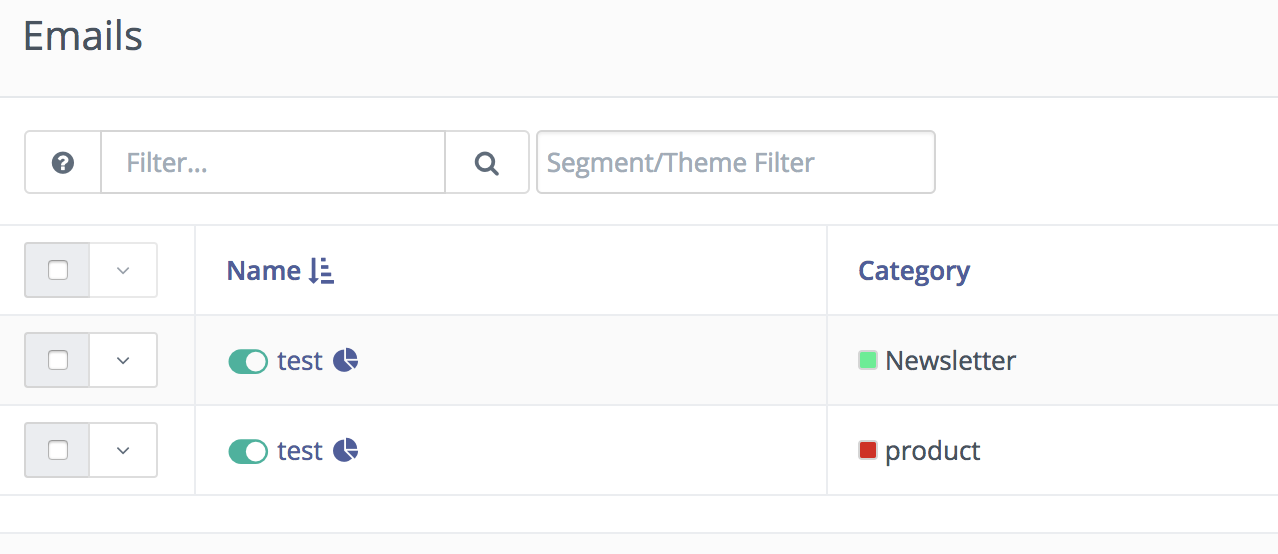
With Webmecanik Automation, you can use categories to organize everything in your instance.
When you have lots of different emails, form, landing pages, etc., it can be useful to have categories to distinguish all your elements.
How to create categories?
Before assigning categories, you must create it.
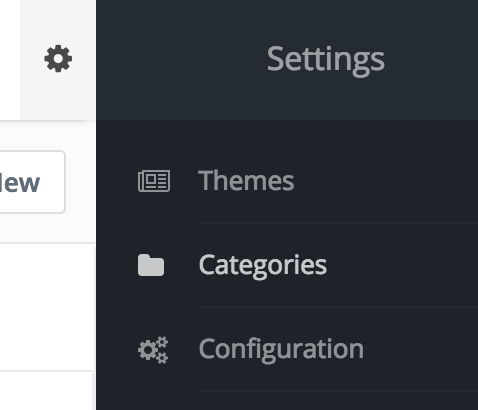
- Connect to your Webmecanik Automation instance, click on the gear at the top right corner then click on "Categories".
- This is where you manage your categories. Click on "New" to create new ones.
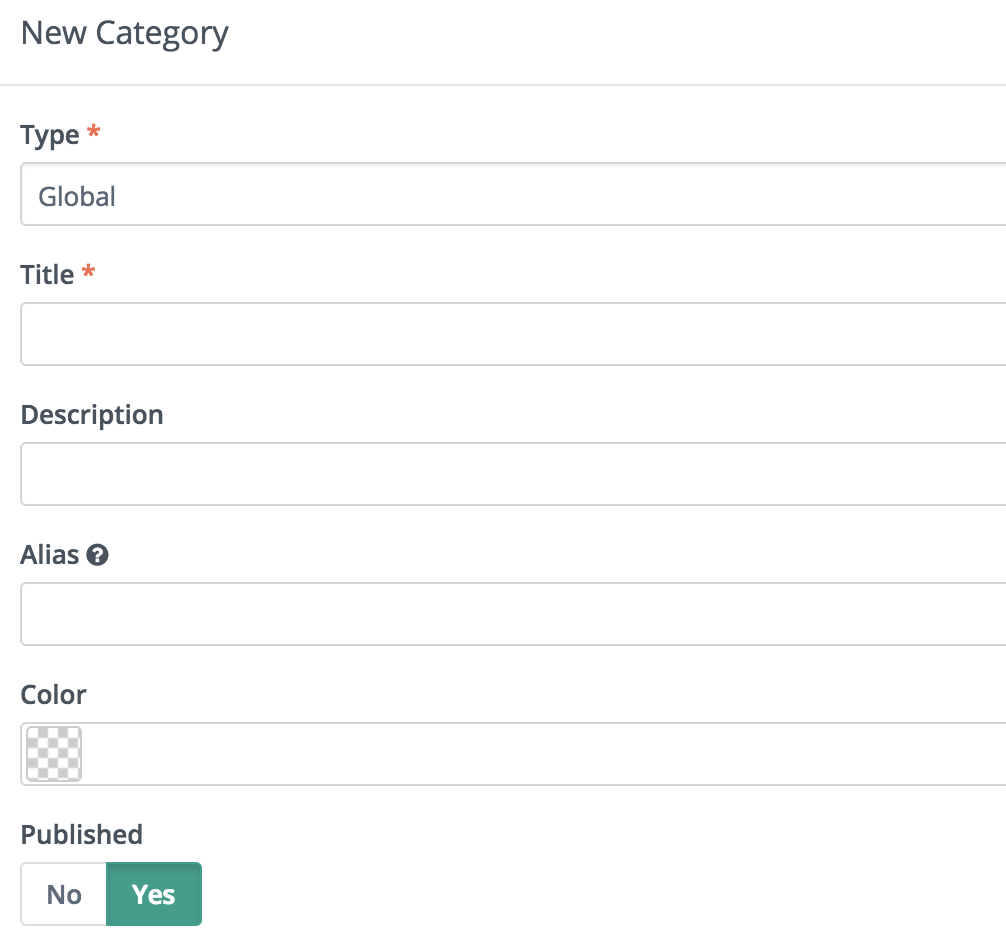
- In the "Type" field, you can choose whether the category is for one type of element such as emails, landing page, assets, forms, focus items, points, social monitoring, campaigns, stages and messages or for all.
- Title will be the name of the category (example: Newsletter).
- Description is not mandatory.
- You can choose a color for each categories to make it easier to see.
- Publish it if you want to assign categories.
Once categories created it, you can assign it to different elements in the edition.
For example, when creating email, the category field allows to assign the email to a category.
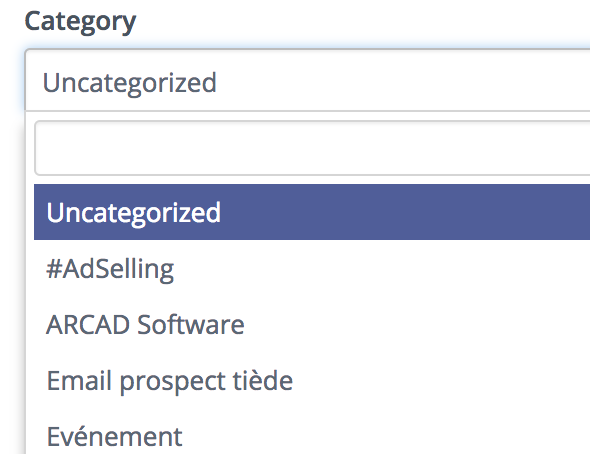
This is the same for all other elements.
It is up to you to manage it as you want.
Comments
0 comments
Please sign in to leave a comment.